Working with Report Pages
Pages provide high-level organization to the content of a Performance Analysis web report. A page can contain one or more entries, typically dealing with related metrics. When you create a page, you specify the entries it should include and the display profile and tab (if any) for each entry.
Creating or Customizing a Page
Before creating or customizing a page, decide what metrics you need to show and in what way. You might want to create or customize entries first (although you can do this as you develop the page, if you prefer).
Procedure 157: Creating a Page
-
In the Generate/Configure a DES Report dialog box, click the “Create a new page” button (
 ).
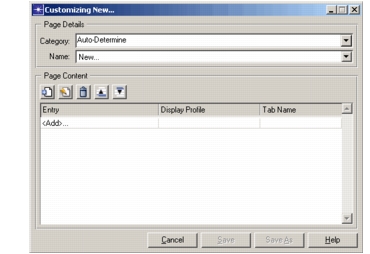
The Customizing New… dialog box opens.
Figure 131: Customizing New… Dialog Box
-
Choose a category for the page by doing one of the following:
- Select an existing category from the pull-down menu.
- Type a new category in the field.
-
Leave the Name field set to New… (you will name the new page when you save it).
-
Specify the entries that should appear on the page. For each entry, do the following:
4.1 In the Entry column, click
<Add>… and select an entry from the list. To create a new entry, select New… from the list and define the entry as described in Creating or Customizing an Entry.4.2 Click in the Display Profile cell and choose how the entry’s data should be displayed. If the available display profiles do not meet your needs, create a new one as described in Display Profile.
4.3 In the Tab Name column, enter the name of the tab under which the entry will appear.
Note: The same entry can appear on a page multiple times, with different display profiles and under different tabs. For example, an entry could appear as a bar chart under a Summary tab and again as a table under a Details tab.
-
Click Save As to save the new page.
Procedure 158: Customizing a Page
-
In the Generate/Configure a DES Report dialog box, do one of the following:
- Right-click a page and choose Customize from the pop-up menu.
- Select a page and click the “Customize selected page” button (
 ).
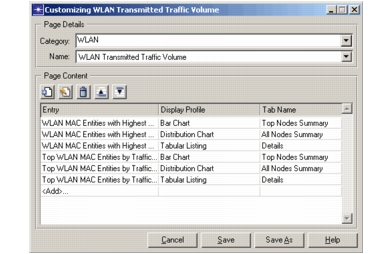
The Customizing
<page_name>dialog box opens.Figure 132: Customizing <page_name> Dialog Box
-
Modify the following parts of the page definition to meet your needs:
- Category
- Name
- Number and order of entries (see Managing the Entries on a Page and Creating or Customizing an Entry)
- Display profiles for entries (see Display Profile)
- Tab names for entries
-
Click Save to modify the page, or Save As to create a new page without changing the original.
Managing the Entries on a Page
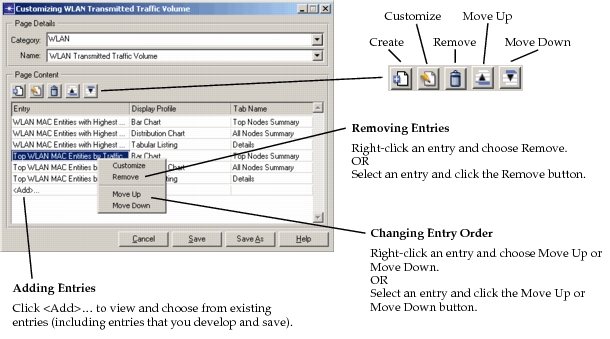
The Page Content area of the Customizing <page_name> dialog box lets you control the content and organization of a report. You can add or remove, customize, and change the sequence of entries.
Figure 133: Managing Entries
To develop a new entry or customize an existing entry by changing its metrics, analyses, filtering, or grouping, see Creating or Customizing an Entry.