Creating a Custom Splash Screen
The splash screen is the image (exclusive of the menu bar) that displays when your ODK application is started. An example splash screen appears in Figure 4.
Figure 4: Example Splash Screen

You can create a custom splash screen for your application from any TIFF (.tif) image. (TIFF images with LZW compression are not supported.) To create a custom splash screen, follow these steps.
Procedure 8: Creating a Custom Splash Screen
-
Convert the TIFF file into the Riverbed Image format. (Only TIFF files can be converted to Riverbed Image format.)
1.1 Create a new network model. 1.2 Choose View > Background > Add Image Map.
*Result:* The Add Map dialog box appears. **Figure 5: Add Map Dialog Box** 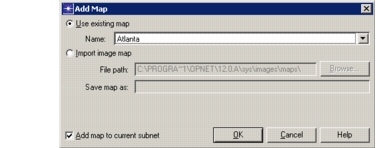1.3 Select the Import Image Map radio button. Navigate to the directory where the TIFF file is located and select the file.
*Result:* The file name appears in the Save Map As field.1.4 Click OK.
*Result:* NetPlanner converts the file to the Riverbed Image file (with the extension `.bkg.i`) and saves it to the first-listed mod_dirs directory (usually `op_models`). NetPlanner then changes to map/background editing mode and displays the desired image in the workspace.1.5 Exit map/background editing mode by choosing View > Background > Map Edit Mode.
*Result:* The message display confirms that you have exited map editing mode. -
Convert the saved file to a splash image by changing the extension from
.bkg.ito.image. On a UNIX platform, you might type something like this:cp my_splash.bkg.i my_splash.image -
Set the image file as your splash screen by adding or modifying the
<application_name>.splash_image preference. You can do this by choosing Edit > Preferences or by directly editing the preferences file. If you were editing the preferences file, the following line would makemy_splash.imagethe splash screen for Netbiz:netbiz.splash_image : my_splash -
If your application was running when you changed the splash screen, exit the application and restart it.
Result: The new splash screen appears.