Editing a Profile Manually
To edit a profile manually, do the following steps:
Procedure 219: Editing a Profile Manually
-
Open the profile you want to edit in the Profile Editor:
- To edit a profile attribute: In the Edit Attributes dialog box, click in the Value field for the attribute; then choose Edit from the pull-down menu.
- To create and edit a new profile in a profile library: Choose Edit > Add Profile in the Profile Library Editor. This opens the newly-created profile in the Profile Editor.
-
Specify a profile name, if desired, in the Profile Name field.
-
Enter labels for the x and y axes in the X Unit and Y Unit fields. This step is required only if you are defining a profile from the Profile Library Editor window. If you are editing an existing attribute (for example, “traffic intensity (packets/sec)”), these labels are already defined.
-
(optional) Specify a uniform interval for the x axis. The Uniform X Intervals checkbox and X Step field allow you to specify uniform time intervals for the profile.
-
(optional) Select the Use start time checkbox and specify a start time for the profile data. The profile start time, together with the network start time, controls when in a simulation the profile data is applied. If a profile doesn’t have a start time, it is assumed to begin at the network start time.
-
Enter the x-y values. To do this, click in the first empty row in the table; then enter x-value (left) and y-value (right) values in each field. The graph on the right automatically updates to reflect the value pairs you enter.
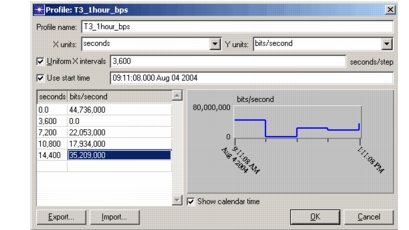
If you specified a uniform time step (that is, if the Uniform X Intervals checkbox is enabled), the x value (by definition this is
last_x_value+x_interval_size) is automatically specified. To specify a value that is not a multiple of the time step, disable the Uniform X Intervals checkbox. -
Click OK to close the Profile dialog box.