Setting Network Views Based on Roles
Using the View menu, you can set the project editor to a subnet or network view based on the roles specified in the role attributes of nodes and/or links.
Choose View > Set View for Subnet or Network > Node and Link Roles to access the Role View Configuration utility as shown in the following figure.
Figure 46: Role View Configuration Utility
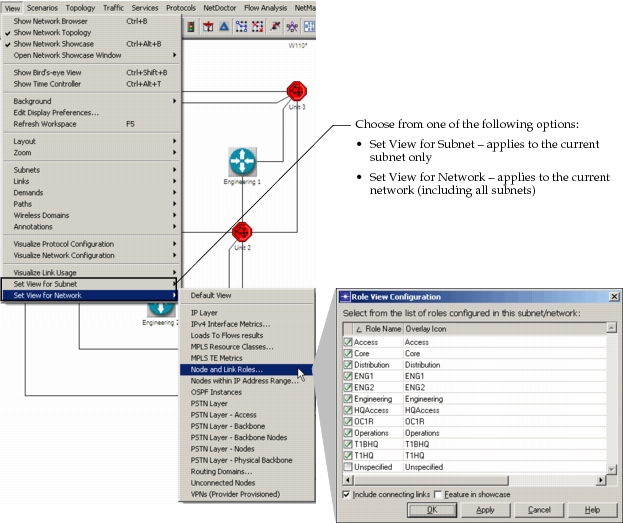
For more information about the Role View Configuration settings, see Role View Configuration Settings.
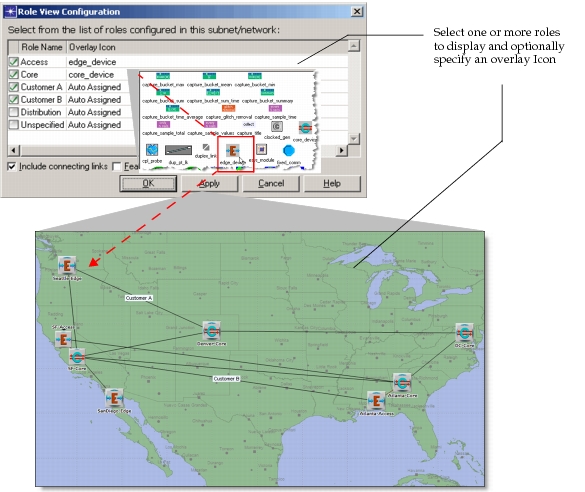
Optionally, you can specify an overlay icon to display on the nodes and links as shown in the following figure.
Figure 47: Role View Configuration
Role View Configuration Settings
The following table provides descriptions of the Role View Configuration settings.
Table 18: Role View Configuration Settings
| Item | Description |
|---|---|
| Checkbox | Select one or more roles for the nodes and/or links you want to display in the project editor. Right-click in the column header to “Select All” or “Unselect All” roles respectively. Note: Nodes without at least one of the roles selected do not display in the network view. For information about including connecting links, see the Include connecting links section below. |
| Role Name | Displays the role names specified in the attributes of nodes and/or links in the current network model. The "Unspecified" role can be used to identify the objects without roles specified in the role attributes. |
| Overlay Icon | Specify visualization settings for the roles selected. Right-click and select from the following menu options: Auto Assigned – Display a text overlay icon based on the role name. The number of characters in the text icon is controlled by the preference values "Link overlay icon size" and "Node overlay icon size." None – No overlay icon is assigned for this role. Browse – Browse the set of available overlay icons in the icon database to select and display on node and/or links with this role. Edit – Specify the icon name manually. Note: When nodes and/or links have multiple roles, a “multiple roles” overlay icon displays instead of any of the individual role icons. |
| Include connecting links | Select to include connecting links when both endpoints have the roles selected—if not selected, only links with the roles specified display in the network view. |
| Feature in showcase | Display all the nodes/links in a network showcase window. If the showcase is already open, all the existing objects are removed from the showcase prior to this operation. Note: This option is useful to view all objects with roles in a “flattened” topology when the network includes subnet objects. |
For more information about role visualization, see:
- “Visualizing Sections of the Network Based on Roles“