Editing a Filter
You can edit a filter anytime during a Server Characterization Editor session. When you edit a filter, you edit the master copy of that filter, which resides in the filter library.
Procedure 21: Editing a Filter
**Warning—**When you edit a filter, the changes you make apply to all instances of that filter; this includes instances that are used in other Server Characterization models.
-
With a Server Characterization model open in the Server Characterization Editor window, select Filters > Manage Filters… from the main menu or click on the Manage Filters toolbar button. (See “Server Characterization Editor Toolbar Buttons” on page 10.)
The Filters dialog box appears.
-
Under the Filters heading of the window, click the Edit… button.
The Edit Filter window appears and the name of the filter no longer appears in the Filter Library list.
Figure 27: Edit Filters Dialog Box
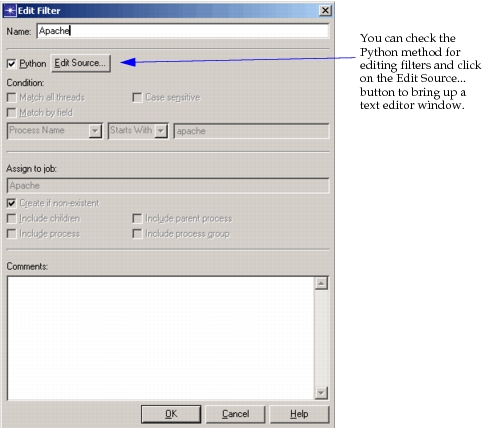
When you click on the Edit... button, the file that you edit is the ‘master’ file from the Filter Library; you cannot edit instances of a filter that appear in the Thread Filters list.
-
(Optional) If you use the Python filtering method, use the following steps.
3.1 Select the Python checkbox, shown in Figure 27, and click on the “Edit Source...” button.
A Python editor window appears. A template is provided to guide you in editing the filter.
Figure 28: Python Editor
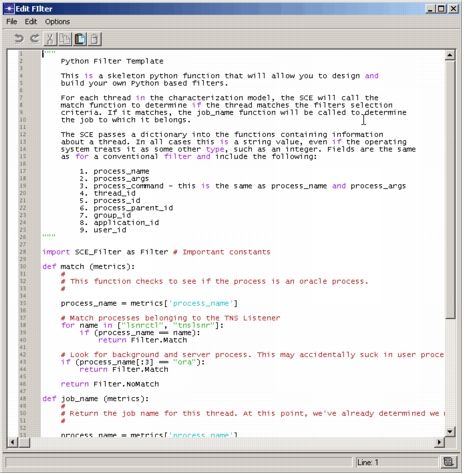
3.2 Use the guidelines provided in the template to define the match conditions. There are two Python methods required. The first determines if the thread is matched by the filter, and the second returns the name of the job to which it is assigned.
3.3 Save the changes to the filter.
3.4 Close the Python editor.
-
Edit the filter characteristics in the Edit Filter dialog box, unless you edited the Python filter.
-
Click OK to apply the changes to the filter.
The Edit Filter dialog box closes and the name of the filter appears in the Filter Library list.