Creating a Server Characterization Model
A server characterization model contains server data that you collect, edit, then export to a network model so you can simulate server performance in a network environment.
Note: A server characterization model differs from a server model. Server characterization models are typically used as a starting point when creating new server models with the Advanced Servers model suite. These server models can then be added to a network topology in the Project Editor.
You can create a new server characterization model two ways:
-
Make a new file and import all the data into the new model
-
Use an existing server characterization model as a template and modify its data.
For more information, see Creating and Using Templates.
Procedure 2: Creating a Server Characterization Model
-
From the System menu, select File > New.
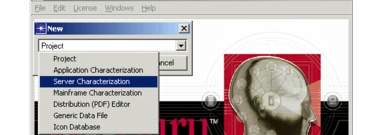
The New dialog box appears with Project (default) selected in the pull-down menu.
Figure 6: Creating a New Server Characterization
-
Select Server Characterization and click OK.
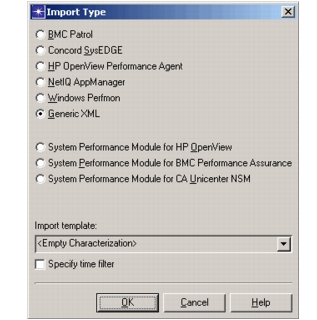
The Import Type dialog box appears.
Figure 7: Import Type Dialog Box
-
Specify the type of import, the template, and whether to use a time filter.
3.1 Choose the source from which you want to import data into the model (XML is the default).
For more information about importing different types of data, see Importing Data into Server Characterization Editor.
3.2 In the Import template field, select the template that best describes your system. If you want a quick system summary, select the
<System>template. The<Empty Characterization>template is used when no other template is suitable.3.3 Select the Specify time filter checkbox if you want to use a time filter.
3.4 Click OK.
The Select Server File for Import dialog box appears.
-
Select the file you want to import, then click OK.
The data appears in the Unallocated Processes/Threads pane of the Server Characterization window, the import dialog box closes, and the Import Properties dialog box appears.
Note: Whenever possible, Server Characterization Editor provides the Import Properties information from the selected template or the system information contained in the data file. For more information about import properties, see Import Properties.
-
Select File > Save to name the Server Characterization model, then click OK.
Riverbed Modeler saves the file with its new name, which appears in the title bar of the Server Characterization Editor window.
To delete a Server Characterization model, see Deleting a Server Characterization Model.