Creating a New Filter
You can create a new filter anytime during an editing session. Any filter you create has its master copy in a filter library. When you select a filter from a filter library, an instance of the filter appears in the Thread Filters list of the model.
Procedure 20: Creating a New Filter
-
With a Server Characterization model open in Server Characterization Editor window, select Filters > Manage Filters… from the main menu or click on the Manage Filters toolbar button. (See “Server Characterization Editor Toolbar Buttons” on page 10.)
The Filters dialog box appears.
-
Under the Filters heading, click on the New… button.
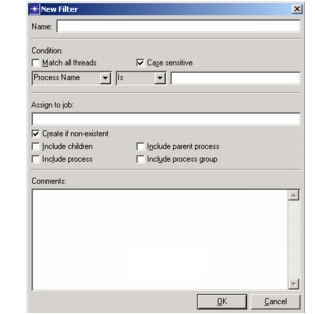
The New Filter dialog box appears.
Figure 26: New Filter Dialog Box
-
Type a filter name in the Name field, select the Conditions you want to filter, assign the target job to receive the data, then click OK.
The New Filter dialog box closes and the new filter appears in the Filter Library list and the Thread Filters list of the current Server Characterization model.