Adding Elevation Data (Terrain Patches) to a Terrain
To build a terrain database, you load elevation data, imagery, and feature data. Then you save the data collection in MTF format. Elevation data is added as terrain patches. Note the limitations in Considerations and Limitations for Building Terrains.
Note: Each time you add a terrain patch, 3D Network Visualizer resets the origin and coordinate system. Therefore, if you add multiple terrain patches, any patches whose origin and coordinate system do not match the patch that is loaded last will not be usable.
Note: When you add a terrain patch, the settings on the Display Settings dialog box, Loader Settings page get applied to the terrain. The Flip DDS Textures setting is relevant to all terrains. The other settings only affect MetaFlight terrains. For details about these settings, please see Displaying DDS Textures Correctly and Loading MetaFlight Terrains.
Procedure 32: Adding a Terrain Patch to a Terrain Database
-
Choose File > Add Terrain Patch, or click the Add Terrain Patch icon (
 ) on the Terrain Toolbar.
The Add Terrain Patch dialog box opens and an Open dialog box opens on top of it.
-
Select a file in a supported format.
-
Click Open.
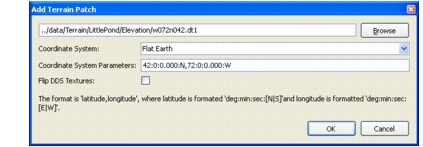
The Add Terrain Patch dialog box displays details about the terrain patch (Figure 56).
Figure 56: Add Terrain Patch dialog box
-
If the terrain patch has DDS textures that are upside down relative to 3D Network Visualizer’s expectations, clear Flip DDS Textures. This setting does not affect paged terrains.
-
Click OK.
The terrain patch is added.
-
Optionally, add additional terrain patches.
-
Save the terrain.