Using the Interface Assistant
Sometimes the configuration files do not have all the information that DCI needs to fully configure the device models. When this happens, you need to supply the missing information after the import. The missing information that can be specified in the Interface Assistant falls into the following categories:
- Unconnected Unnumbered Interfaces—DCI knows that the interface or port is connected to another but is unable to determine the identity of the other interface or port.
- Unspecified Data Rates—DCI connects two interfaces or ports but cannot determine the data rate of the connection.
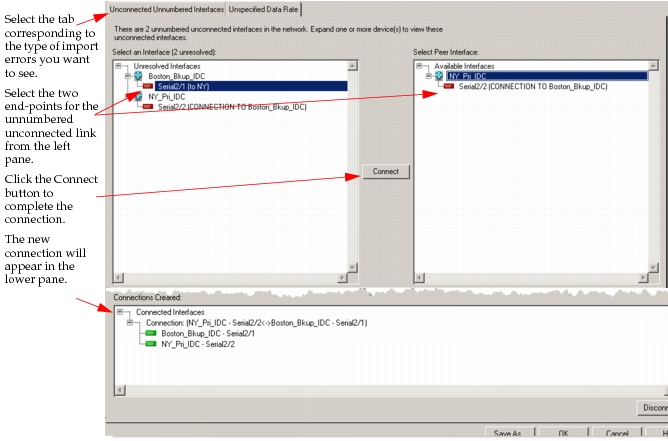
When additional import information is needed, the following dialog box appears:
Figure 12: Import Assistant
Connecting Unconnected Unnumbered Interfaces
If unconnected, unnumbered interfaces are detected in the network model, the Interface Assistant opens with the Unconnected Unnumbered tab up front. Follow Procedure 2 to connect the unnumbered interfaces.
WARNING: This procedure applies only to interface connections that were missing in the configuration data; you cannot use this method to change connections that were set during the import (which appear with dark green icons when expanded in the Interface Assistant).
When you have connected all interfaces, all of the formerly red icons will be light green, indicating that the interface has been modified and is now properly connected.
Note: You can avoid the occurrence of unconnected, unnumbered interfaces by ensuring that you have the output of show cdp neighbors detail command in your configuration files.
Procedure 2: Connecting Unnumbered Interfaces
-
Select the Unconnected Unnumbered Interfaces tab, if it is not already selected.
All routers with unnumbered, unconnected interfaces appear in the left pane.
-
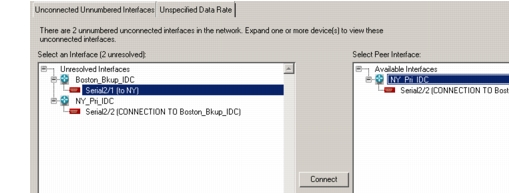
Expand the devices by clicking on the plus sign (Windows) or arrow (Linux) next to the router icon.
Figure 13: Interface Assistant—Unconnected Unnumbered Interfaces
-
Select the interface of one end of the connection you want to make in the left pane.
Available interfaces to which you can connect appear in the right pan.
-
Select the interface in the right pane to which you want to connect, and click the Connect button.
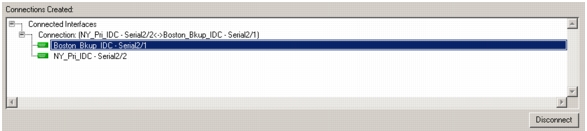
The two interfaces are connected. The new connections appear in the Connections Created pane at the bottom of the dialog box and are colored green. If you want to disconnect the interfaces, select the connection and click on the Disconnect button.
Figure 14: Interface Assistant—Connections Created
Specifying Data Rates
You can also set the data rate on router interfaces for which no specified data rate was found during import. When you set a data rate, the change affects the interfaces on either end of the connection because dissimilar interfaces cannot transmit and receive data.
Procedure 3: Specifying the Data Rate of an Interface
-
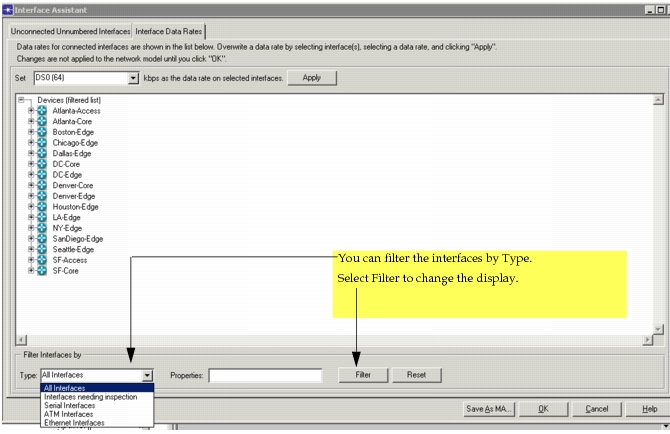
Select the Unspecified Data Rate tab in the Interface Assistant, if it is not already selected.
A list of routers with unspecified data rates appears.
Figure 15: Interface Assistant—Unspecified Data Rates
-
Expand the list of interfaces for each router by clicking on the plus sign next to the router.
Interfaces with unspecified data rates appear red.
-
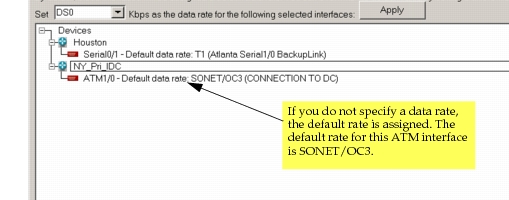
Select the interface whose data rate you want to change. You can select multiple interfaces by holding down the Control key and clicking on multiple interfaces. The data rate indicated for an interface is the default data rate that will be assigned if you do not specify the actual data rate.
Figure 16: Interface Assistant—Set Data Rate
-
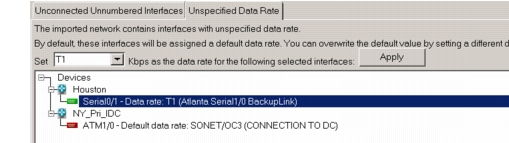
Choose a data rate from the Set pull-down menu. If the rate you want does not appear on this menu, choose Edit and specify the data rate (in bps). Then click Apply.
The Data Rate fields for both interfaces are updated to reflect the change, and the displayed interface now has a green icon. The displayed data rate now shows the data rate you applied.
Figure 17: Interface Assistant—New Data Rate Set
Note: If the icon for an interface is still red after you have specified a data rate, the interface is not connected. Connect the interface as described in Connecting Unnumbered Interfaces, then set the data rate.
Saving Changes from the Interface Assistant to a Model Assistant File
You can save the changes you made to a model assistant file, which you can then use during another import. To create a model assistant file from the changes made in the Interface Assistant, click the Save As... button after you have specified all of the missing information. Provide a name for the model assistant file you want to create in the primary models directory. For information about editing model assistant files, see “Model Assistant“.
Using Model Assistant Files with Imported Topologies
Model assistant files let you specify information about the network topology that is not included in the configuration files.
WARNING: If you do not convert your pre-11.5 model assistant files containing networks imported through DCI, they will not work in 11.5.
To apply model assistant files after importing a network, use the procedure described in “Model Assistant“. You can also apply model assistant files during the import, by specifying the files in the Import Device Configurations dialog box. If you specify information about unnumbered interfaces and unspecified data rates in model assistant files, applying the files during the import lets you bypass the Import Assistant.
For general information about how to create, edit, and apply model assistant files, see “Model Assistant“.