Exporting Traffic Data into a CSV File
The following procedure describes the steps for generating a single report and containing traffic load data. Optional steps are provided for using this report to generate data for multiple devices.
Procedure 9: Generating a CSV File for Traffic Data from SevOne
-
Log in to the SevOne web user interface.
-
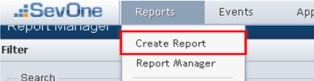
Hover over the Reports menu on the SevOne homepage, and select "Create Report".
A new tab will open with a window to edit the report properties.
Figure 2: Create a SevOne Report
-
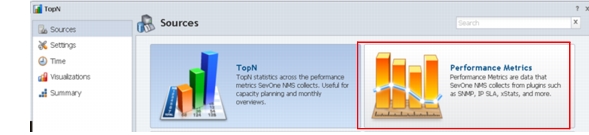
Select "Performance Metrics" as shown below.
Figure 3: Choose Performance Metrics for Report
-
Configure the report settings in the wizard.
4.1 Select Resources, as shown in the example below.
**Figure 4: Example Resources for Report** 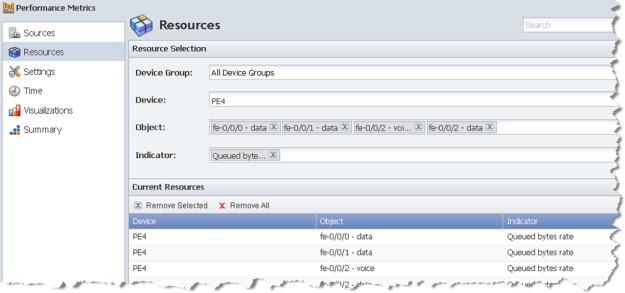4.2 In Settings, make the Preferred Units "Bytes".
**Note:** NetPlanner is designed to handle link load data from SevOne in bytes only. **Figure 5: Setting the Preferred Units in SevOne** 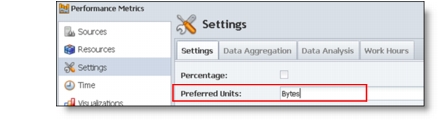4.3 Specify the Time Span for which you want to export data, and set the Time Zone associated with the data you are exporting.
**Figure 6: Setting the Time Span and Time Zone in SevOne** 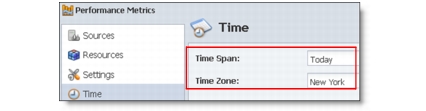4.4 Select Visualizations, and configure the report as shown below.
**Figure 7: Configuring Visualizations in SevOne** 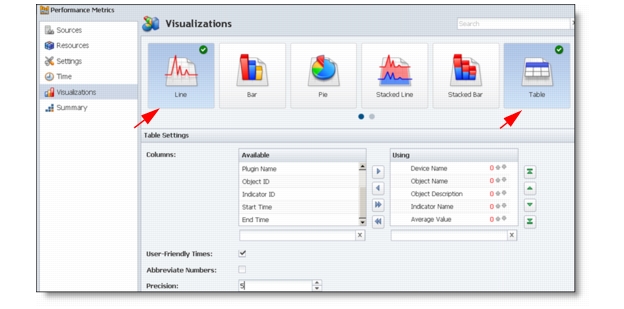4.5 Review the summary, and click Finish.
-
Save the report.
-
Generate the report as a CSV file.
6.1 Hover over the Settings icons in upper right-hand corner of the report. Select "Get CSV" to generate the report.
**Figure 8: Generate the CSV File** 6.2 When prompted, choose Save File.
-
Place a copy of the file in a directory that is accessible to NetPlanner (for example,
c:\SevOneTrafficor a folder in your home directory).
Optional Steps to Add Devices to the Report
-
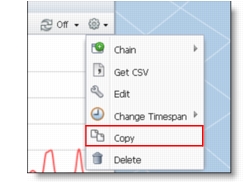
Copy the attachment in your report.
Figure 9: Copy a Report Attachment
-
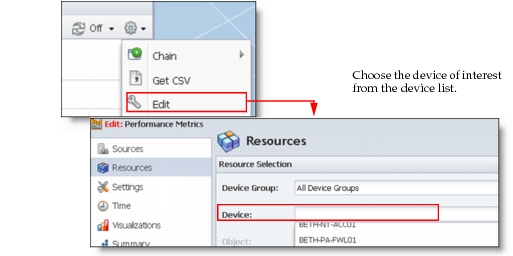
Edit the attachment properties in Resources to specify another device for which you want to export data.
Figure 10: Set Attachment Properties
-
Click "Finish" when you are done. Repeat these steps for each device you want to add to the report.
-
Generate the CSV file as specified in step 6.