Creating a Template for Exporting Traffic Data into a CSV File
If you want to create a template that lets you reuse the same basic settings for different devices, use the procedure below.
Procedure 10: Creating a Report Template to Export a CSV File for a Single Device with Multiple Interfaces
-
Log in to the SevOne web user interface.
-
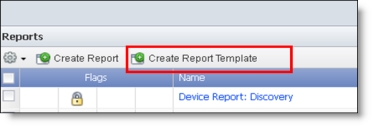
Hover over the Reports menu on the SevOne homepage, and select Create Report Template.
A new tab will open with a window to edit template properties.
Figure 11: Create a SevOne Report Template
-
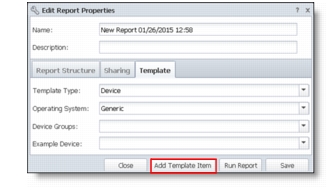
Fill in the template options, and choose Add Template Item.
Figure 12: Template Options
-
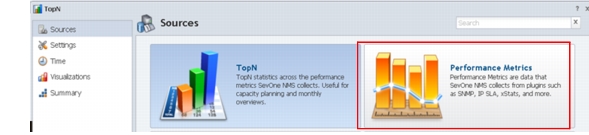
Select "Performance Metrics" as shown below.
Figure 13: Choose Performance Metrics for Report
-
Configure the report settings.
5.1 Configure the Chaining settings. Ensure that the Resource Limit is set high enough to accommodate the number of interfaces for which you want to export data.
**Figure 14: Settings for Chaining** 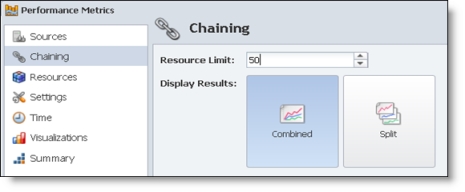5.2 Select the Resources, as shown below.
**Figure 15: Choose the Resources for Template** 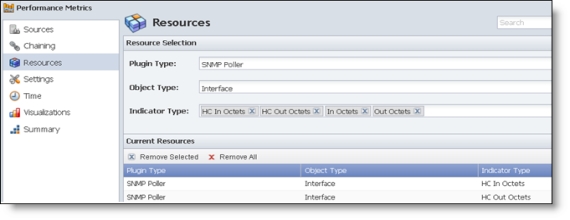5.3 Select Settings. Configure the Preferred Units as "Bytes".
**Note:** NetPlanner is designed to handle link load data from SevOne in bytes only. **Figure 16: Setting the Preferred Units in SevOne** 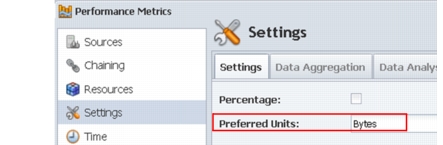5.4 Select Time. Specify the Time Span for which you want to export data, and set the Time Zone associated with the data you are exporting.
**Figure 17: Setting the Time Span and Time Zone in SevOne** 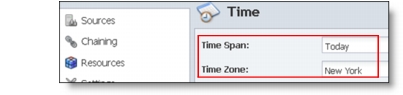5.5 Select Visualizations and configure the template as shown below.
**Figure 18: Configuring Visualizations in SevOne** 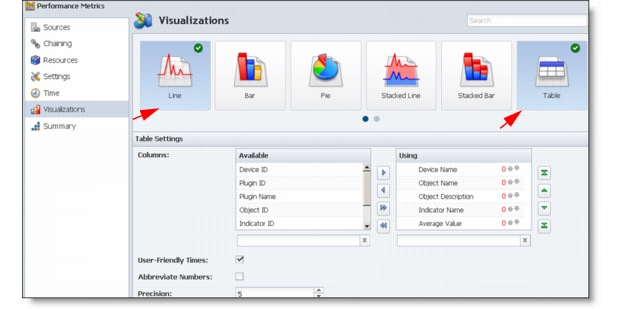5.6 Review the summary, and click Finish.
-
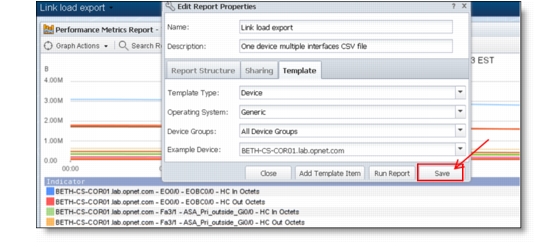
Save the template. The report template may be used for different devices.
Figure 19: Save the Report Template
-
Generate the report as a CSV file.
7.1 Hover over the Settings icons in upper right-hand corner of the report. Select "Get CSV" to generate the report and save it to your local machine.
7.2 When prompted, choose Save File.
-
Place a copy of the file in a directory that is accessible to NetPlanner (for example,
c:\SevOneTrafficor a folder in your home directory).
For future reports, you can access the template by navigating to Reports > Report Manager, setting the "Show Template" option to Yes, and applying the filter. You can run the report on your device of choice.
Import CoS metrics and baseline loads into NetPlanner by choosing Traffic > Import Baseline Loads > From SevOne..., as shown below.
Figure 21: Importing Baseline Loads from SevOne
See the section Working with Network Traffic > Importing Baseline Traffic Loads in the User Guide for more information.