Adding a Terrain Server
This tutorial explains how to add a terrain server that streams data from directories on your local network. It uses the San Luis Obispo terrain data, which is provided with 3D Network Visualizer. In the tutorial, we copy an existing .earth file. Then we change the elevation and imagery data paths to point to the correct files and directories in ./data/Terrain/SanLuisObispo.
Procedure 199: Adding a Terrain Server
-
Choose Settings > Display. The Display Settings dialog box opens.
-
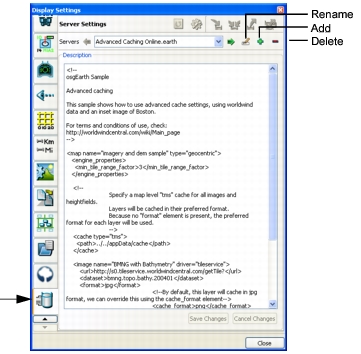
Select the Server Settings page (Figure 192).
Figure 192: Server settings page
-
In the Servers list, select
Local World.earth. -
Click the Add icon (
 ). A new configuration file is added to the list. It copies the contents of
Local World.earthand names itLocal World_1.earth. -
The image element reads as follows:
<image name="World Imagery" driver="gdal">
   <url>../../data/Terrain/World/Imagery/World4km.tif</url>
</image>
The SanLuisObispo/Imagery directory has multiple files, so we want to point the imagery URL to the directory, not to a specific file. 3D Network Visualizer will use all of the files as needed.
Change the image element name and URL to:
<image name>=”SanLuisObispo Imagery” driver=”gdal” <url>../../data/Terrain/SanLuisObispo/Imagery</url> </image> -
The elevation section of the file reads as follows:
<url>../../data/Terrain/World/Elevation/earthnew/w001001.adf</url>If there is only on elevation file, the URL must specify the file. If there are multiple elevation files, the URL must specify the directory.
Change the elevation URL line to:
<url>../../data/Terrain/SanLuisObispo/Elevation</url> -
Change the heightfield element’s name value from:
<heightfield name="World Elevation" driver = "gdal">to:
<heightfield name="SanLuisObispo Elevation" driver = "gdal"> -
Click the Rename icon (
 ). (If you are prompted to save changes, click Save.) The Rename Server dialog box opens.
-
Change the name to
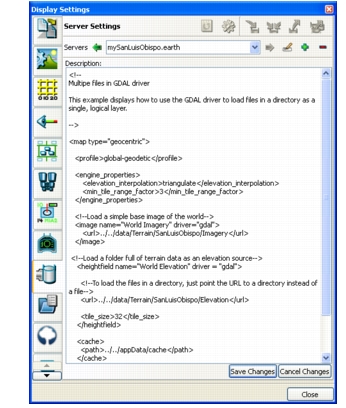
mySanLuisObispo.earth. (If you are prompted to save changes, click Save.) The completed server should look like Figure 193.Figure 193: SanLuisObispo.earth server
-
Click Save Changes. The new server file is saved to
./userData/servers. -
Close the Display Settings dialog box.
Connect to the SanLuisObispo Terrain Server
Now we will connect to the new server. We can also compare it to the San Luis Obispo terrain that ships with 3D Network Visualizer, which was created using the composable terrain method.
Procedure 200: Connecting to the Server
-
Choose New > Scene.
-
Choose Settings > Terrain. The Terrain Settings dialog box opens.
-
Select the Terrain Contents page.
-
Click Add Terrain Server. The Add Terrain Server dialog box opens.
-
In the Servers list, select
mySanLuisObispo.earth. -
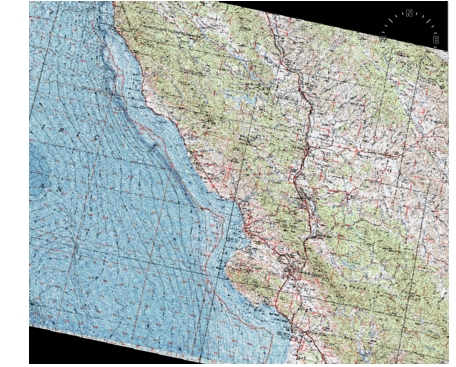
Click Connect. The server is loaded. It will be visible as a small speck in the window (Figure 194), so you will have to move the observer closer to it (Figure 195). Notice how as you move the observer closer, the terrain imagery gets paged in at greater levels of detail.
Figure 194: SanLuisObispo.earth initial view

Figure 195: SanLuisObispo.earth close view
-
Choose File > Save Terrain. The Save Terrain dialog box opens.
-
Type a name, such as mySanLuisObispoEarth. (Do not name it SanLuisObispo or you will overwrite the terrain shipped with 3D Network Visualizer.)
-
Click Save.
-
Choose File > Close Terrain.
-
Open the
SanLuisObispo.mftterrain. Then open theSanLuisObispoTopoGdal.mtfterrain. Compare these terrains to each other and the one you just built.