Connecting to a Simulation Network
To view a simulation, you must connect 3D Network Visualizer to a simulation network. 3D Network Visualizer includes connectors for HLA 1.3 (RPR FOM 1.0 and RPR FOM 2.0, draft 17). You can change the configuration values of the default connectors and you can add additional connectors. For details about creating and editing connections, please see Appendix F “Managing Network Connections“ on page 547.
When 3D Network Visualizer starts up, it does not automatically connect to a simulation network unless you configure it to do so. The auto connect feature lets you specify that 3D Network Visualizer automatically connect to a network through a connection when it starts up. If you do not use auto connect, you must connect manually. A connector’s status is listed in the Status column in the Connection Status page of the Simulation Connections dialog box.
Note: You can connect to more than one simulation network at the same time.
Note: You can quickly get connection status, connect to a network, and disconnect on the Simulation Connections Toolbar. For details, please see Using the Simulation Connections Toolbar.
Procedure 25: Connecting to a Simulation Network
-
Choose Settings > Connection.
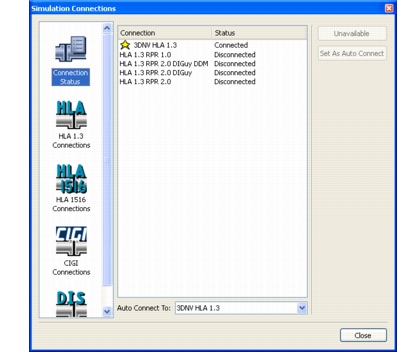
The Simulation Connections dialog box opens (Figure 44).
Figure 44: Connection Status Page
-
Select the page for the connection type that you want to use.
-
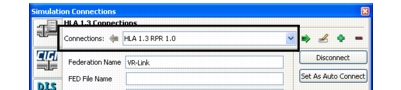
Select a connector in the Connections drop-down list (Figure 45).
Figure 45: HLA 1.3 Connections Page
-
Click Connect.
Setting Up Auto Connect
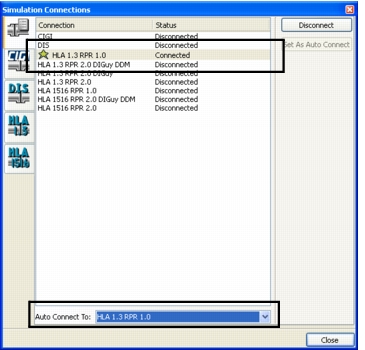
If you specify auto connection, 3D Network Visualizer connects to the specified simulation network when it starts. If a connection is designated as an auto connection, a star is added to its entry in the connections list (Figure 46).
Figure 46: Auto Connect Enabled
Procedure 26: Configuring Auto Connection
-
Choose Settings > Connection. The Simulation Connections dialog box opens.
-
To configure auto connect on the Connection Status page (Figure 46):
2.1 Select the Connection Status page.
2.2 Do one of the following:
- Select the desired connection in the Connection list and click Set As Auto Connect.
- Select a connection from the Auto Connect To drop-down list. (To disable auto connection, select the blank line.)
To configure auto connect on a protocol-specific page:
2.3 Select the page for the connection type that you want to use.
2.4 Select a connector in the Connections drop-down list.
2.5 Click Set As Auto Connect.
Disconnecting from the Simulation Network
To disconnect from the simulation network:
Procedure 27: Disconnecting from the Simulation Network
-
Choose Settings > Connection.
The Simulation Connections dialog box opens (Figure 44).
-
On the Connection Status page or on a protocol-specific page, select the connection that you want to disconnect.
-
Click Disconnect.
Using the Simulation Connections Toolbar
The Simulation Connections Toolbar lets you quickly open the Simulations Connections dialog box to the Connection Status page. It also lets you quickly connect to and disconnect from a specific connection.
Figure 47: Simulation Connections Toolbar
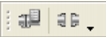
To view connection status, click the Connection Status icon ( ).
Procedure 28: Quickly connecting to selected simulation connections
-
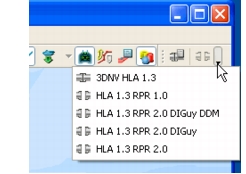
Click the down arrow next to the Connect icon. A list of all configured simulation connections is displayed.
Figure 48: Connection List
-
Click the connection that you want to connect to when you use the toolbar.
Note: You can only select one connection in the list. To connect to multiple simulations, use the Connection Settings dialog box.
Note: The Connect icon toggles between an open and closed state depending on the status of the connection.
-
Click the Connect icon.
To disconnect all connections, click the Disconnect icon ( ).