Configuring a Data Source for MySQL
This section explains how to configure a data source for MySQL on Windows XP. Before you can configure a data source, you must install MySQL and the MySQL ODBC driver and you must create a MySQL database to configure as the data source. Please consult your MySQL documentation for an explanation of how to do this. The procedure in this section was developed using MySQL 5.0.
Procedure 190: Configuring an ODBC Data Source for MySQL
Note: If you are running the Logger on 64-bit Windows, run
C:/Windows/SysWOW64/odbcad32.exe. Then go to step 4.
-
Open the Control Panel.
-
Double-click Administrative Tools. The Administrative Tools folder opens (Figure 155).
-
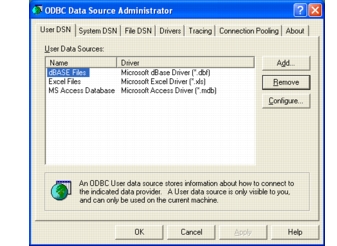
In the Administrative Tools folder, double-click Data Sources (ODBC). The ODBC Data Source Administrator dialog box opens (Figure 161).
Figure 161: ODBC Data Source Administrator dialog box
-
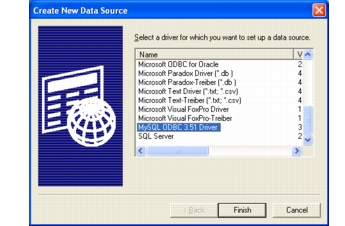
Click Add. The Create New Data Source dialog box opens (Figure 162).
Figure 162: Create New Data Source dialog box
-
Select the MySQL ODBC driver.
-
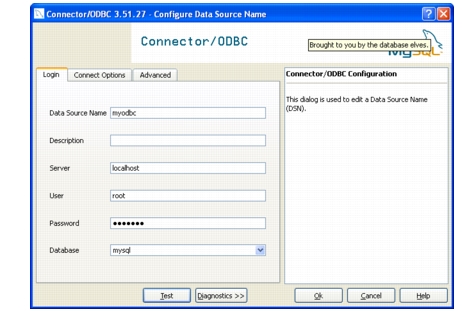
Click Finish. The Connector/ODBC version - Add Data Source Name dialog box opens.
Figure 163: Connector ODBC version - Add Data Source Name dialog box
-
Type a name for your data source.
-
Complete the Server, User, and Password fields.
-
Enter the name of the database that you created for Logger data.
-
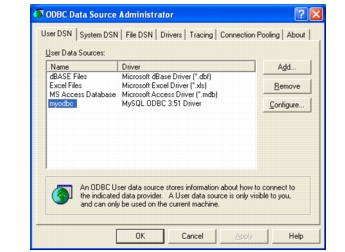
Click OK. The new data source is displayed in the ODBC Data Source Administrator dialog box (Figure 164).
Figure 164: ODBC Data Source Administrator dialog box