Attaching the Observer at Startup
There may be times when you want to attach the observer to an entity as soon as 3D Network Visualizer starts up. For example, suppose you are using 3D Network Visualizer as a flight simulator. You might want it to start up and immediately display the cockpit view for the aircraft. 3D Network Visualizer has a command-line argument, --bindObservers, that lets you bind the observer to an entity using saved views.
Procedure 64: Starting 3D Network Visualizer with the Observer Bound to an Entity
-
Run a live or recorded simulation.
-
Attach the observer to the entity that you want it to be attached to when you start 3D Network Visualizer. If you have multiple observers, create a saved view for each observer that you want to attach automatically.
-
Save the views.
-
If you have multiple observers, save the display engine configuration.
-
Start 3D Network Visualizer with the
--bindObserverscommand-line option and use your saved views file as the argument to--bindObservers. If you need to specify more than one observer, use--dispSettingto specify the display engine configuration file that defines the observers. You must also specify the terrain file to load:set OP_3DNV_VISUALIZER_EXTRA_ARGS = --bindObservers "observer1,...,observern, ../appData/settings/vantageIG/saved_views.osrx" --dispSetting displayconfig.dcx terrain_file.mtf op_3dnv_launcher.exeIf the simulation is running, 3D Network Visualizer attaches the observer to the entity in the saved view. If the simulation is not running, 3D Network Visualizer attaches the observer when the entity is next discovered.
Note: If your display configuration has more than one observer, you can save multiple views and automatically bind the observers to the views. The observers are bound to views on a one-to-one basis in the order that the observers are listed in the command and the saved views are listed in the file. If you only have one observer, it is automatically bound to the first view in the file.
Observer Attachment Tutorial
This tutorial implements the procedure described in the previous section using files provided with 3D Network Visualizer and Multi-Federate Logger for 3DNV. It attaches the observer to one of the aircraft in the maklandDemo recording.
Procedure 65: Attaching the Observer to an Entity at Startup
-
Start 3D Network Visualizer.
-
Load the Makland terrain.
-
Start Multi-Federate Logger for 3DNV.
-
Load the version of maklandDemo that is appropriate for the Logger version you are running.
-
Connect 3D Network Visualizer to the correct simulation network.
-
Run the maklandDemo recording.
-
Attach the observer in Mimic mode to FtrFw4.
-
If the Observer Views Panel is not open, choose View > Observer Views Panel.
-
On the Observer Views Panel, click the Add icon (
 ). The view is listed in the panel window.
-
Save the view to a file, for example
FtrFw4.osrx. -
Shut down 3D Network Visualizer.
-
Start 3D Network Visualizer with the following command line:
set OP_3DNV_VISUALIZER_EXTRA_ARGS = --bindObservers "Observer 1, ../appData/settings/vantageIG/FtrFw4.osrx" ../userData/terrains/Makland.mtf
op_3dnv_launcher.exe
Note: In this example, it isn’t strictly necessary to specify the observer because there is only one observer. The observer name is included to illustrate the complete syntax of the command. If you had more than one observer in your display configuration and multiple views to attach them to, you could use a command like the following:
set OP_3DNV_VISUALIZER_EXTRA_ARGS = --bindObservers ”Observer 1,
   Observer A,../appData/settings/vantageIG/FtrFw4.osrx”
   --dispSetting displayConfig.dcx ../userData/terrains/Makland.mtf
op_3dnv_launcher.exe
You could also do this:
set OP_3DNV_VISUALIZER_EXTRA_ARGS = --bindObservers ”Observer A,
   Observer 1,../appData/settings/vantageIG/FtrFw4.osrx”
   --dispSetting displayConfig.dcx ../userData/terrains/Makland.mtf
op_3dnv_launcher.exe
The observers get bound to views in the order in which they are listed.
3D Network Visualizer includes an example saved view, FtrFw4.osrx, that you can use to try out this example.
Binding Multiple Observers Tutorial
This tutorial shows how to bind multiple observer views to multiple windows. The tutorial does the following:
- Creates two windows.
- Saves the display engine configuration.
- Saves different views for each window.
- Loads the terrain, saved views, and display engine configuration from the command line.
3D Network Visualizer loads the terrain, opens the two windows in the display engine configuration, and assigns a saved view to each window.
Create the Windows
Procedure 66: Binding Multiple Observer Views to Multiple Windows
-
Start 3D Network Visualizer .
-
Load
VR-TheWorldOnline.mtf. -
Choose View > Display Engine Configuration Editor Panel. The panel shows one window with one channel. The observer assigned to the channel is named Observer 1 (Figure 53).
Figure 53: Observer 1
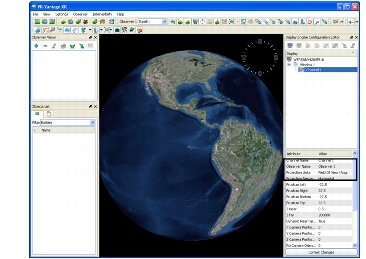
Observer 1
-
Choose File > New Stealth Window. A window titled Window 2 opens. It shows the same view as the main window. A window called Window 2 is added to the display engine configuration. The channel properties show that the window uses Observer 2 (Figure 54).
Figure 54: Observer 2
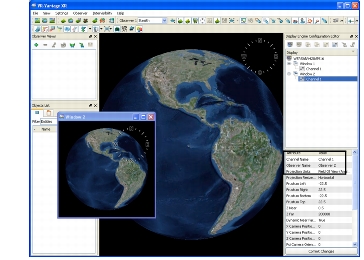
Observer 2
Figure 55: Observer 3
Save the Display Engine Configuration
Procedure 67: Saving the Display Engine Configuration
- In the Display Configuration Editor Panel, select the display engine (the top line).
- Click the Save Display Engine Configuration icon (
 ). The Save Display Engine Configuration dialog box opens.
- Type a name for the configuration, for example,
BindObserversTutorial.dcx. - Click Save.
Create and Save the Views
Procedure 68: Creating Observer Views for Each Observer and Saving Them
- If the Observer Views Panel is not open, choose View > Observer Views Panel.
- Click in the main window to give Observer 1 focus. Confirm this by looking at the observer name displayed on the Observer Settings Toolbar.
- On the Observer Views Panel, click the Add icon (). A view called 1 - Absolute is added.
- Double-click the name of the view to make it editable. Change the name to Western Hemisphere.
- Click in Window 2. Make sure that the Observer Settings Toolbar shows that the active observer is Observer 2.
- Drag the view of the world to show Africa.
- Add a new view to the Observer Views Panel.
- Change the name of the view to Africa.
- Add a new view to the Observer Views Panel.
- Change the name of the view to Africa.
- Click the Save Observer Views icon (). The Save Observer Views dialog box opens.
- Type a name for the saved views, for example,
BindObserversTutorialViews.osrx. - Click Save.
- Shut down 3D Network Visualizer.
Start 3D Network Visualizer with the Views and Display Engine Configuration
To load the display engine configuration and bind observers to the saved views, start 3D Network Visualizer with the following command:
set OP_3DNV_VISUALIZER_EXTRA_ARGS = --dispSetting    ..\appData\settings\vantageXR\BindObserversTutorial.dcx
   --bindObservers "Observer 1,Observer 2,Observer 3,
   ..\appData\settings\vantageXR\BindObserversTutorialViews.osrx"    ..\userData\terrains\VR-TheWorldOnline.mtf
op_3dnv_launcher.exe
3D Network Visualizer starts up, loads the display engine configuration, opens the windows, and assigns the saved views to the window.