Creating and Editing Observer Modes
The 3D Network Visualizer 3D comes with different 3D observer modes (listed in Table 31 on page 138). They are configured with the display settings, key mappings, and model sets that users most commonly want to use. However, if these settings do not meet your needs, you can easily edit them or create new observer modes.
Creating an Observer Mode
Procedure 38: Creating an Observer Mode
-
Choose Settings > Display.
The Display Settings dialog box opens.
-
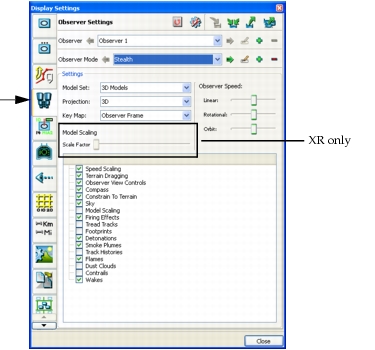
Select the Observer Settings page (Figure 31).
Figure 31: Observer Settings page
-
Click the Add icon (
 ) to the right of the Observer Mode drop-down list.
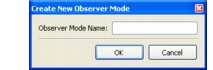
The Create New Observer Mode dialog box opens (Figure 32).
Figure 32: Create New Observer Mode dialog box
-
Type a name for the new observer mode.
-
Click OK.
-
In the Settings group box, select a model set. (3D Network Visualizer XR only.)
-
Select the key map you want to use.
-
Enable or disable the mode-specific settings. The list of settings varies depending on the projection and model set, and the application.
Deleting an Observer Mode
Procedure 39: Deleting an Observer Mode
-
Choose Settings > Display.
The Display Settings dialog box opens.
-
Select the Observer Settings page (Figure 31).
-
In the Observer Mode list, select the observer mode that you want to delete.
-
Click the Delete icon (
 ).
Editing an Observer Mode
Procedure 40: Editing an Observer Mode
-
Choose Settings > Display.
The Display Settings dialog box opens.
-
Select the Observer Settings page (Figure 31).
-
In the Observer Mode list, select the observer mode that you want to edit.
-
Edit the attributes of the observer mode as desired.
Renaming an Observer Mode
Procedure 41: Renaming an Observer Mode
-
Choose Settings > Display.
The Display Settings dialog box opens.
-
Select the Observer Settings page (Figure 31).
-
In the Observer Mode list, select the observer mode that you want to rename.
-
Click the Rename icon (
 ).
The Rename Observer Mode dialog box opens.
-
Type the new name.
-
Click OK.