Setting the Date and Time of Day
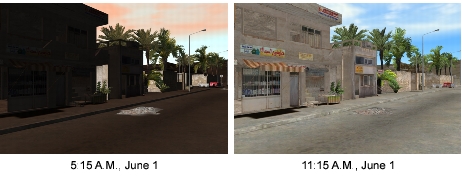
3D Network Visualizer changes the ambient light based on the time of day. It can adjust the time of day at which it changes light based on the simulated date. Figure 25 illustrates different time of day settings.
When you save a scene, 3D Network Visualizer saves the time of day as part of the scene.
Figure 25: Time of Day
Procedure 28: Setting the Date and Time of Day
-
Choose Settings > Scene.
The Scene Settings dialog box opens.
-
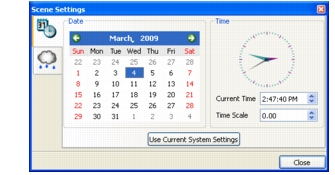
Select the Date and Time page (Figure 26).
Figure 26: Date and Time page
-
To specify the date, select a date in the calendar.
-
To specify the time, in the Time group box, type a time value, in HH:MM:SS format, in the Current Time box, or set the value using the spinner controls.
The analog clock display changes to reflect the current simulated time.
-
To set the date and time of day to the system settings, click Use Current System Settings.
Setting the Time Scale
3D Network Visualizer advances the date and time based on a time scale. By default the time scale is 0.00 and 3D Network Visualizer does not advance time. A time scale of 1.00 means 3D Network Visualizer advances time at real time. The time advance only affects 3D Network Visualizer’s display of ambient light. It has no relationship to or affect on the simulation that 3D Network Visualizer is displaying.
Procedure 29: Setting the Time Scale
-
Choose Settings > Scene.
The Scene Settings dialog box opens.
-
Select the Date and Time page (Figure 26).
-
In the Time group box, type a value in the Time Scale box or use the spinner control to set it.